
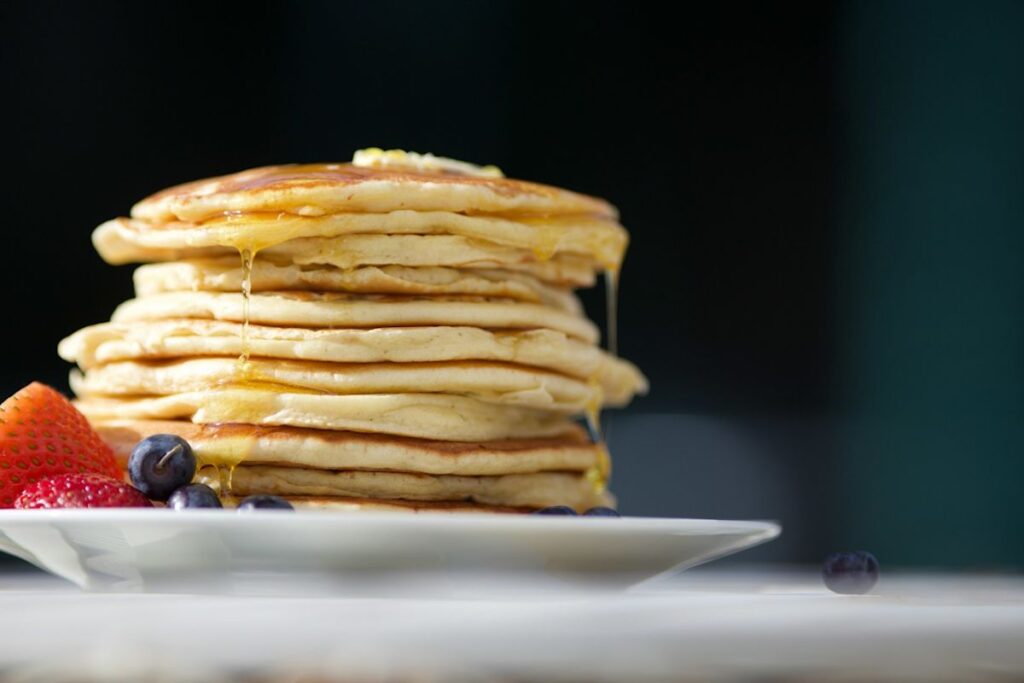
Saturday mornings at grandpa’s ran on a different clock. The coffee was already brewed when you came downstairs, the pan was already warm, and he’d already decided what you were having. These weren’t complicated meals. They were the handful of dishes he’d been cooking for decades, things he could do without thinking. They tasted exactly right because someone else was doing all the work.
The grandfather kitchen of the 1960s and 1970s kept a short pantry: a sack of yellow cornmeal, a block of livermush from the butcher counter if he lived in the Carolinas, a can of lard by the stove, a bag of grits on the low shelf. Some of those breakfasts have nearly vanished from Saturday tables. Here are seven of them, with full recipes close to the way he made them.
1. Sausage gravy over biscuits
Sausage gravy over biscuits started as a way to stretch a small amount of pork into a breakfast that could feed a family. A pound of bulk sausage, crumbled and browned, leaves behind enough fat to pull a white gravy together. That gravy poured over four or five split biscuits could fill a table. The dish runs deep in the rural South and the Appalachian highlands, a fixture from Virginia down through Kentucky and Tennessee, cooked in cast-iron and eaten before anybody went outside to work.
The dish followed people north. In the 1940s and 1950s, families left the coalfields and hill farms of Appalachia for factory towns: Cincinnati, Dayton, Detroit, Youngstown. The families who moved kept making it in their new kitchens, and over the following decades it spread onto diner menus far from the hills where it started.
What shifted most on that trip was the sausage. Hill-country families had used a coarsely ground, heavily spiced pork, often bought from a local butcher or ground at home and seasoned with sage and red pepper the way each household preferred. Packaged breakfast sausage was milder and more uniform, which made it easier to keep on hand, and it became what a lot of grandpas reached for on a Saturday morning. Many of them leaned hard on black pepper to pull the gravy back toward what they remembered. In parts of the South it also goes by ‘sawmill gravy.’ Food lore ties the name to Appalachian logging camps, where crews lived on coffee, biscuits, and gravy.
Ingredients (Serves 4 to 6)
-
1 tablespoon baking powder
-
6 tablespoons cold unsalted butter, cut into 1/2-inch pieces
-
1 pound bulk pork breakfast sausage
-
1/4 cup all-purpose flour
-
1/2 teaspoon black pepper
Instructions
1. Preheat the oven to 450°F. Whisk 2 cups flour, the baking powder, and 1 teaspoon salt together in a large bowl.
2. Scatter the cold butter pieces over the flour. Work them in with your fingertips until the largest pieces are roughly pea-sized.
3. Pour in 3/4 cup cold milk and stir just until the dough comes together; it will look rough and shaggy.
4. Turn the dough out onto a lightly floured surface. Pat it to about 3/4 inch thick and cut out rounds with a 2-inch biscuit cutter. Gather the scraps, pat once more, and cut again.
5. Arrange the biscuits on an ungreased baking sheet. Bake 12 to 14 minutes, until the tops are golden.
6. While the biscuits bake, cook the sausage in a large skillet over medium heat, breaking it into small crumbles, until no pink remains and it reaches 160°F, 7 to 9 minutes.
7. Do not drain the fat. Sprinkle 1/4 cup flour over the sausage and stir to coat. Cook, stirring, for 1 to 2 minutes, until the raw flour smell is gone.
8. Pour in 2 cups milk about 1/2 cup at a time, stirring constantly after each addition. The mixture will seize and clump, then loosen as more milk goes in.
9. Keep the heat at medium and cook, stirring constantly, until the gravy is thick and bubbling, 4 to 5 minutes. Stir in 1/2 teaspoon black pepper and add salt to taste.
10. Split the hot biscuits and ladle the gravy over them.
2. Fried cornmeal mush
Fried cornmeal mush is a two-day breakfast, which is exactly the kind of thing a grandfather could plan. You make the porridge the night before, pour it into a loaf pan, and by morning it has set up firm enough to slice. In a cast-iron skillet with a spoonful of bacon drippings, those slices go golden on each side, crunchy at the edges and just soft in the center. Serve them with maple syrup or a drizzle of honey. The whole plate disappears before anyone thinks to ask what they’re eating.
Cold is not optional. Mush that hasn’t chilled for at least four hours stays too loose to hold together in the pan. Slices cut from a barely-cooled loaf tear where a fully set one holds clean. Fat temperature matters just as much. Lay the slices into drippings that aren’t yet shimmering and they’ll stick and break apart before you get a crust. Wait until the bacon fat or butter is hot enough to spit at a drop of water, then slide the slices in and leave them alone for three full minutes before you try to flip.
Ingredients (Serves 4, about 16 slices)
-
1 tablespoon unsalted butter
-
3 tablespoons bacon drippings or unsalted butter, divided, for frying
-
Maple syrup or honey, for serving
Instructions
1. Bring the water and salt to a boil in a medium saucepan over medium-high heat.
2. Reduce heat to medium-low. Pour the cornmeal in a thin, steady stream, whisking constantly to prevent lumps.
3. Switch to a wooden spoon and cook over low heat, stirring frequently, until the mush is very thick and pulls away from the sides of the pan, 20 to 25 minutes.
4. Remove from heat and stir in 1 tablespoon of butter.
5. Line a 9×5-inch loaf pan with plastic wrap, leaving overhang on all sides. Pour the mush in and smooth the top. Let cool to room temperature, then fold the plastic wrap over the surface and refrigerate for at least 4 hours, or overnight.
6. When ready to cook, lift the mush out of the pan by the plastic wrap and set it on a cutting board. Cut crosswise into slices about 1/2 inch thick.
7. Heat 1 1/2 tablespoons of bacon drippings in a cast-iron or heavy skillet over medium-high heat until shimmering. A drop of water should spatter immediately when it hits the pan.
8. Add half the slices in a single layer, not touching. Cook undisturbed for 3 to 4 minutes, until a deep golden-brown crust has formed on the bottom. Flip carefully and cook for another 3 to 4 minutes on the second side.
9. Transfer to a warm plate. Add the remaining 1 1/2 tablespoons of drippings to the skillet, let it heat through, and repeat with the remaining slices.
10. Serve immediately with maple syrup or honey.
3. Buttermilk silver dollar pancakes
Silver dollar pancakes were the grandfather move because they asked so little: one cup of flour, one cup of buttermilk, one egg, and a few tablespoons of butter made about two dozen of them, enough to keep a table of grandkids busy. Keeping the first batches warm in a low oven lets everyone eat at once. The batter gets stirred only until no dry flour shows, since a few lumps are fine and overworking it makes the cakes come out dense. Dropping it by the tablespoon keeps the cakes small and uniform. Six or eight fit on a twelve-inch griddle at once. The ‘silver dollar’ in the name refers to the size of the old silver dollar coin, about an inch and a half across. A tablespoon of batter spreads to about that size or a touch wider and cooks through in about two minutes.
Ingredients (Makes about 24 silver dollar pancakes, serves 4)
-
1 tablespoon granulated sugar
-
2 tablespoons unsalted butter, melted
-
1 tablespoon unsalted butter, for the griddle
Instructions
1. Whisk the flour, sugar, baking powder, baking soda, and salt together in a medium bowl.
2. In a separate bowl, whisk the buttermilk and egg together, then whisk in the 2 tablespoons of melted butter.
3. Pour the wet ingredients into the dry and stir until just combined. Stop when no dry flour shows; a few lumps are fine.
4. Heat a griddle or large skillet over medium heat and add the 1 tablespoon of butter. When the butter foams and subsides, the surface is ready.
5. Drop the batter by the tablespoonful onto the griddle, leaving about an inch between cakes. You should get 6 to 8 per batch.
6. Cook until bubbles break across the surface and the edges look set, about 1 to 1 1/2 minutes. Flip and cook 30 to 45 seconds more, until the undersides are golden brown. Slide the finished cakes onto a plate and repeat with the remaining batter.
4. Homemade waffles from scratch
A good waffle from scratch has a sound to it when you pull it off the iron, a dry crack rather than a wet peel. The outside carries real crunch, the kind that pushes back when you press it with a fork. Inside it stays tender and open, almost spongy where the steam hasn’t fully escaped, so butter dropped on top melts fast and pools down into the squares. Grandfathers who made these from a bowl and a whisk got a slightly different result every Saturday, thicker one week and more golden the next, depending on how hot the iron ran.
Timing matters more here than in almost any other breakfast food. A waffle pulled one minute too soon comes out pale and soft, the steam still locked inside. Left on the iron through that last burst of steam, it dries and crisps the way it should. The batter is mildly sweet and properly salted, so maple syrup reads clean against it rather than piling sweetness onto something already cloying.
Ingredients (Makes 6 to 8 waffles, serves 4)
-
2 tablespoons granulated sugar
-
2 teaspoons baking powder
-
1/2 cup unsalted butter, melted and cooled slightly, plus extra for brushing the iron
-
1 teaspoon vanilla extract
Instructions
1. Preheat your waffle iron on medium-high. Brush the plates lightly with melted butter just before you pour the first batch.
2. Whisk the flour, sugar, baking powder, and salt together in a large bowl.
3. In a separate bowl, whisk the egg yolks, whole milk, melted butter, and vanilla until smooth.
4. Pour the wet ingredients into the dry ingredients and stir until just combined. A few lumps are fine; do not overwork it.
5. In a clean bowl, beat the egg whites with a hand mixer or a whisk until stiff peaks form.
6. Fold the beaten whites into the batter in two additions, turning gently to keep as much air in as possible.
7. Pour about 2/3 cup of batter onto the center of the hot iron (the right amount varies by iron size; you want the batter to reach just short of the edges when you close it). Close the iron.
8. Cook until steam stops escaping from the sides, about 4 to 5 minutes. Open the iron; the waffle should release cleanly and be an even golden brown. If it sticks or looks pale, close the iron and give it another 30 to 60 seconds.
9. Serve immediately. Waffles held in a 200°F oven on a wire rack will stay crisp for up to 15 minutes without steaming themselves soft.
5. Stone-ground grits with butter and a fried egg
On Saturday mornings, the kitchen belonged to grandpa. Weekdays, he stayed out of it. But once the grandkids were sleeping on the fold-out sofa and the Saturday sun came through the window at a low angle, he was already at the stove before anyone else stirred. Grits were the thing he could make unhurried, and unhurried was the whole point.
Stone-ground grits need patience that quick-cook grits do not ask for. They go into boiling salted water and stay on low heat for close to an hour, with someone at the pot fairly often to keep them from sticking and to watch the texture change. That kind of kitchen work suited Saturday.
The egg went on top, fried in a separate skillet while the grits rested. Butter went into the grits, then the grits went into the bowl, then the egg. You pushed a spoon through the yolk, it ran into the grits, and the bowl changed. Nobody called it anything special. It was just what grandpa made on Saturdays.
Ingredients (Serves 2)
-
1/2 cup stone-ground grits
-
2 tablespoons unsalted butter (for the grits)
-
1 teaspoon unsalted butter (for frying the eggs)
-
2 large eggs (pasteurized if you want a runny yolk)
Instructions
1. Bring the water and salt to a boil in a medium saucepan over medium-high heat.
2. Whisk in the stone-ground grits in a slow, steady stream. Reduce the heat to low.
3. Cover and cook, stirring every 5 minutes, for 45 to 60 minutes, until the grits are thick and no longer feel gritty when you press a small bit between your fingers. If they get too thick before they are tender, stir in hot water a few tablespoons at a time.
4. Remove the pan from heat and stir in the 2 tablespoons of butter. Taste and adjust salt.
5. Melt the teaspoon of butter in a small skillet over medium heat.
6. Crack the eggs in one at a time. Cook until the whites are fully set and the edges have just begun to curl at the bottom, about 3 minutes for a runny yolk (use pasteurized eggs), or cover the skillet and cook a minute or two longer for a fully set yolk, which is what USDA recommends.
7. Divide the grits between two bowls. Slide one egg on top of each and finish with black pepper.
6. Broiled cinnamon toast
The spread is softened butter and cinnamon sugar beaten into a paste, laid thick enough on white bread that you can see where the knife pulled. Under the broiler, maybe two and a half minutes, the butter melts outward and the sugar bubbles, then sets as it cools into something between toffee and cracked glass. Eaten hot, the topping is still slightly tacky in the center. Once the toast cools, it hardens into a crisp shell with a snap the hot version never has. The spread needs equal parts softened butter and granulated sugar. Softened butter holds the sugar in an even layer so it melts and bubbles across the whole slice. Cold butter tears the bread and leaves bare spots that scorch.
Ingredients (Makes 4 slices, serves 2 to 4)
-
4 tablespoons unsalted butter, softened to room temperature
-
1/2 teaspoon ground cinnamon
-
4 slices white sandwich bread
Instructions
1. Position a rack 4 inches below the broiler element and preheat the broiler on high for 5 minutes.
2. Combine the softened butter, granulated sugar, cinnamon, and salt in a small bowl. Mix with a fork until completely uniform, with no streaks of dry sugar or cinnamon.
3. Spread the mixture evenly over one side of each bread slice, going all the way to the edges so the crust doesn’t stay pale.
4. Arrange the slices spread-side up on a rimmed baking sheet. Slide the sheet under the broiler and cook for 2 to 3 minutes, watching the entire time or checking every 30 seconds, until the topping is bubbling and golden with a few amber patches. Do not step away: the difference between done and burned is less than a minute.
5. Remove the pan and let the toast rest on the sheet for 1 minute before serving. The topping will be tacky when hot and will firm up to a hard, snappable shell as it cools.
7. Pan-fried livermush
Livermush is a cooked loaf of pig liver, pork scraps, and cornmeal pressed into a rectangular block and sold chilled in the meat case. In North Carolina, where it’s been a breakfast staple for generations, it sits right next to the sausage links and the country ham. It’s hog-butchering economy turned into something people actually look forward to: every scrap of the pig went somewhere, cornmeal stretched it further, and at some point the right cook figured out that slicing it thick and getting it properly brown in a cast iron skillet was the way to eat it.
Slices about half an inch thick, dredged lightly in flour, give the crust something to catch on and produce a crackle that plain slices never quite reach. The skillet needs to be fully hot before the livermush goes in, with just enough oil to coat the bottom. Then the slices stay put for three to four minutes before anyone touches them. Flip too soon and the crust tears. Wait until the edges pull away from the pan. That crust is what grandpa was after. A fried egg on the side is the way it often shows up on North Carolina breakfast plates.
Ingredients (Serves 2 to 3)
-
1 pound livermush, sliced 1/2 inch thick (6 to 8 slices)
-
1/4 cup all-purpose flour
-
1/4 teaspoon black pepper
-
2 tablespoons vegetable oil or lard
Instructions
1. Pat the livermush slices dry with a paper towel.
2. Stir together the flour and black pepper in a shallow dish. Dredge each slice in the flour mixture and shake off the excess.
3. Heat the oil in a large cast iron skillet over medium-high heat until it shimmers.
4. Add the livermush slices in a single layer, working in batches if needed. Cook without moving them for 3 to 4 minutes, until the bottom is deep brown and the edges begin to pull away from the pan.
5. Flip each slice and cook the second side for 2 to 3 minutes, until equally browned.
6. Transfer to a plate, season with salt, and serve immediately.
Whatever he cooked, he made it the same way every time, and you knew it by the smell before you reached the bottom step. That kind of breakfast is worth knowing how to cook.