
Public pools in the 1960s and 1970s ran on chlorine, concrete, and a concession window the size of a coat closet. The menu was short: a handwritten board, a chest freezer, a flat-top grill going full-bore through the afternoon, and prices low enough that a kid could cover a snack with the change in a swimsuit pocket. Snow cones came in wax paper cones. Ice cream sandwiches lived in a cold fog behind a hinged lid. Lemon shake-ups got made to order, one cup at a time, with real lemons rolled hard against the counter first to loosen the juice.
Most of those foods are easy to make at home, since fudge pops are cooked milk and cocoa poured into molds, an orange cream bar can be made from gelatin and ice cream set in a pan, and tater tots are grated potato pressed into cylinders and dropped into hot oil. None of it calls for unusual equipment, and the seven recipes below cover the ones worth keeping.
1. Snow cones with homemade cherry syrup
The snow cone vendor at the pool was usually whoever had talked their way into a small stand near the gate, a folding table with a rattling electric shaver and a row of squeeze bottles lined up by color. You got one in a paper cone, and you ate it walking on hot concrete because the syrup bled through the paper fast. Cherry and grape were the colors most stands kept stocked.
Shaved ice with syrup is much older than the public pool, and the paper-cone snow cone is usually credited to Samuel Bert, who sold them at the State Fair of Texas in Dallas starting in 1919 and later built and sold his own ice-crushing machines. By the 1960s the cone and the squeeze bottle were standard at fairs, ballparks and pool gates, and the cherry syrup on most of them tasted far more like candy than like fruit, which nobody seemed to mind. In New Orleans, shaved ice is called a sno-ball rather than a snow cone; Hansen’s Sno-Bliz has been in business since 1939 and on Tchoupitoulas Street since 1944, and the ice there is shaved from a block into fine, fluffy flakes, with the syrup added in layers so the flavor runs all the way through.
Ingredients (Makes about 1 cup syrup, enough for 6 snow cones)
-
1/2 cup fresh or frozen tart cherries, pitted and roughly chopped
-
1 tablespoon fresh lemon juice
-
6 cups crushed ice (about 1 cup per snow cone)
-
6 paper snow cone cups or cones
Instructions
1. Combine the sugar and water in a small saucepan over medium heat. Stir until the sugar dissolves completely, about 2 minutes.
2. Add the cherries and lemon juice. Bring to a gentle simmer and cook, stirring occasionally, for 10 minutes, until the cherries have given up their color and the liquid is a deep pink-red.
3. Remove the pan from the heat and let it cool for 5 minutes. Pour the mixture through a fine-mesh strainer into a heatproof jar or bowl, pressing the fruit firmly to extract all the liquid. Discard the solids.
4. Let the syrup cool to room temperature, at least 30 minutes. It will thicken slightly as it sits. The syrup keeps, covered and refrigerated, for up to two weeks.
5. To serve, pack crushed ice firmly into each cone or cup. Pour 2 to 3 tablespoons of cherry syrup over the ice and serve immediately.
2. Fudge pops (frozen chocolate milk bars)
The fudge pop cost pocket change at most concession stands, and it came out of a chest freezer wrapped in white paper that stuck slightly when wet. You peeled it off fast or it tore, and either way you lost the first bite getting it free. What you had left was a cold, dense bar of frozen chocolate that went soft in your grip before you were halfway through it, leaving your fist brown and your popsicle stick shiny. No candy in a bag and no candy in a box has ever tasted quite like that, partly because of the heat and partly because of the hunger and partly because you had nothing else to do but eat it.
At home, the easy move is to pour chocolate milk into a mold and freeze it. That gives you an icy block, not the creamy bar the concession stand sold, because plain milk freezes into hard crystals without any structure to hold them apart. The fix is cornstarch cooked into the milk while it’s still warm. Three tablespoons per two and a half cups of milk is enough to build a gel that stays smooth in the freezer, so the pop has that dense, almost pudding-like chew instead of crunching like a snow cone with chocolate flavoring. You heat the mixture until it thickens visibly on the back of a spoon before it ever goes near the mold.
Ingredients (Makes 8 pops)
-
1/4 cup unsweetened cocoa powder
-
1 teaspoon vanilla extract
Instructions
1. Whisk together the cocoa powder, sugar, cornstarch, and salt in a medium saucepan until no lumps remain.
2. Pour in the milk in a slow, steady stream, whisking as you go to keep everything smooth.
3. Set the pan over medium heat and cook, whisking almost constantly, until the mixture thickens enough to coat the back of a spoon and just begins to bubble at the center, 8 to 11 minutes.
4. Pull the pan off the heat and stir in the vanilla.
5. Let the mixture cool for about 10 minutes, stirring every couple of minutes so a skin does not form on top.
6. Pour into ice pop molds, leaving about a quarter inch of space at the top. Insert sticks and freeze until completely firm, at least 5 hours or overnight.
7. To release, run the outside of each mold under warm tap water for 10 to 15 seconds, then slide the pop free.
3. Orange creamsicle bars
The orange-and-vanilla bar on a stick was a freezer-case staple at pool snack bars, and the pan version below gets the same flavor out of two boxes of orange gelatin and a pint of vanilla ice cream, cut into sixteen bars from one 9×13 pan. The gelatin has to dissolve completely in boiling water first, with a full two minutes of stirring until the liquid is clear, because ice cream stirred into undissolved granules leaves a gritty bar that no amount of freezing will fix. Folding in whipped cream at the end, rather than relying on ice cream alone for body, gives the finished bar a lighter texture that sits closer to the airy center of the original.
Ingredients (Makes 16 bars)
-
2 packages (3 oz each) orange gelatin
-
1/2 cup cold orange juice
-
2 cups vanilla ice cream (about 1 pint), softened until just scoopable
-
2 tablespoons granulated sugar
-
1 teaspoon vanilla extract
Instructions
1. Dissolve both packages of gelatin in the 2 cups boiling water, stirring for 2 full minutes until no granules remain and the mixture is completely clear.
2. Stir in the cold orange juice. Let the mixture cool to room temperature, about 20 minutes, until it is no longer warm to the touch.
3. Add the softened vanilla ice cream to the cooled gelatin a large spoonful at a time, whisking after each addition until fully incorporated and smooth.
4. In a separate bowl, beat the heavy cream with the sugar and vanilla extract until it holds medium peaks.
5. Fold the whipped cream into the orange mixture until no white streaks remain.
6. Pour into a 9×13-inch pan. Press plastic wrap directly against the surface and freeze until firm, at least 4 hours or overnight.
7. To serve, run a sharp knife under warm water and wipe it dry before each cut, then slice into 16 bars. Set the bottom of the pan in a shallow tray of warm water for about 20 seconds to help the bars release cleanly.
4. Homemade ice cream sandwiches
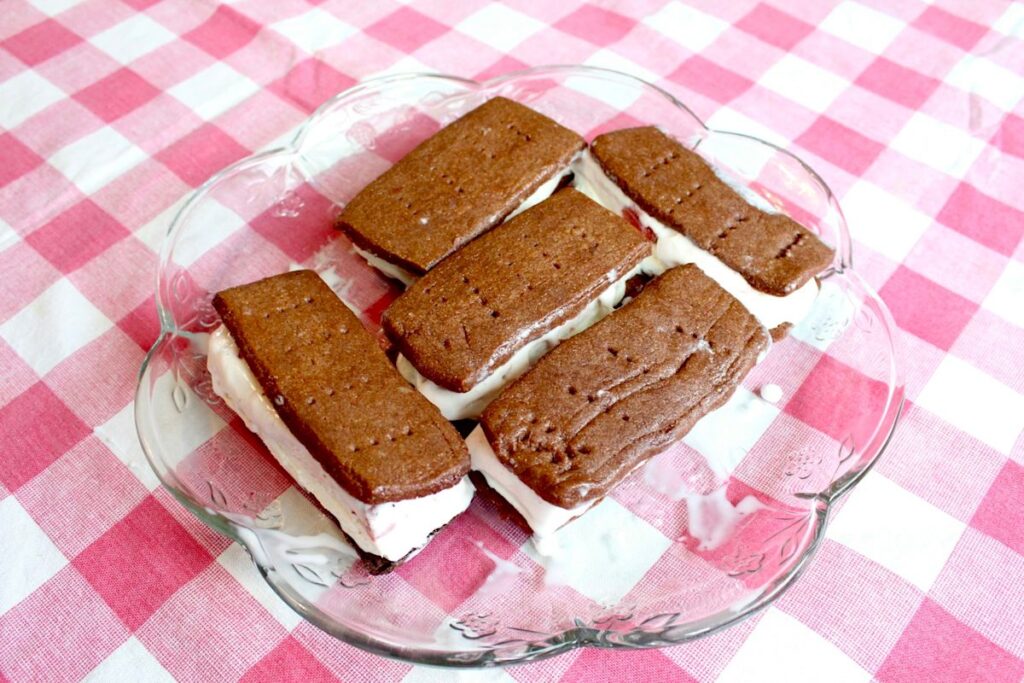
The wafer was never quite a cookie. It was something softer and darker, pressed flat and cut into a rectangle, and it spent however long it took you to walk from the concession window to the chain-link fence soaking up cold from the ice cream pressed against it. By the time you bit in, the outside of the wafer had gone faintly damp and the inside stayed dry. The ice cream in the middle was still hard enough to push back.
Cold and sweet and barely salty, with that slight gumminess where the wafer met the filling. The chocolate tasted more like color than flavor. You ate it fast because the sun was doing its work on both ends at once, the wafer softening further and the ice cream running toward your wrist.
Ingredients (Makes 8 ice cream sandwiches)
-
2 cups heavy whipping cream, cold
-
1 cup sweetened condensed milk
-
2 teaspoons vanilla extract, divided
-
1 cup all-purpose flour, plus more for rolling
-
1/2 cup Dutch-process cocoa powder
-
6 tablespoons unsalted butter, softened
Instructions
1. Make the ice cream base: Line a 9×13-inch baking dish with plastic wrap, leaving several inches of overhang on all sides. In a large bowl, whip the cold heavy cream to soft peaks, about 3 minutes. Fold in the sweetened condensed milk and 1 teaspoon of the vanilla until fully combined. Pour into the lined dish, smooth the surface, fold the plastic wrap over the top, and freeze until firm, at least 4 hours or overnight.
2. When you are ready to bake the cookies, heat the oven to 350°F. Line two baking sheets with parchment paper.
3. Whisk the flour, cocoa powder, baking soda, and salt together in a medium bowl.
4. In a large bowl, beat the butter and sugar until light and smooth, about 2 minutes. Beat in the egg and the remaining 1 teaspoon vanilla. Add the flour mixture and the 2 tablespoons of whole milk, mixing until a stiff, uniform dough forms.
5. Wrap the dough and chill it for 20 to 30 minutes so it rolls cleanly. Turn it onto a lightly floured surface and roll to 1/4-inch thickness. Cut into 3×2-inch rectangles and place them 1 inch apart on the prepared baking sheets. Gather the scraps, re-roll once, and cut again. You need 16 cookies.
6. Bake 10 to 12 minutes, until the cookies are dry to the touch and set at the edges. Cool on the pans for 5 minutes, then transfer to a wire rack and cool completely before assembling.
7. Assemble the sandwiches: Lift the ice cream slab from the dish using the plastic wrap overhang and set it on a cutting board. Working quickly, cut it into 3×2-inch pieces to match the cookies. Lay one ice cream piece on the flat side of one cookie and top with a second cookie flat side down, pressing gently to seat it. Move each finished sandwich to a parchment-lined tray in the freezer as you go.
8. Once all 8 are assembled, wrap each one tightly in plastic wrap and freeze for at least 1 hour before serving.
5. Grape slush
The grape slush was the one thing the counter kid could make without looking up, since many pool snack bars ran some version of it with shaved ice, a pump jug of grape syrup and a paper cup. The teenagers working those counters were often hired just for the summer, and a drink that needed nothing more than ice, syrup and a cup was exactly what a fifteen-year-old could turn out all afternoon.
On a crowded weekend the line could wrap back past the water fountain and everything came out fast and thin, while a slow weekday afternoon gave the counter time to make it right, with enough syrup to turn a kid’s lips purple.
At home, Concord grape juice gets closest to that color and that bite. The pool version leaned sweet in a way that canned soda never does, partly because whoever was measuring the syrup was eyeballing it, and partly because everything tastes stronger when you’re nine years old and your hair is wet. A shot of lemon juice in the blender cuts the sugar enough to keep it from cloying, and the whole thing takes about a minute.
Ingredients (Serves 4)
-
1 1/2 cups Concord grape juice
-
3 tablespoons granulated sugar
-
2 tablespoons fresh lemon juice
Instructions
1. Combine the grape juice, water, sugar, and lemon juice in a blender. Pulse two or three times and let it run for about 15 seconds to dissolve the sugar completely.
2. Add the ice cubes. Blend on high for 30 to 45 seconds, stopping when the mixture is uniformly slushy with no large chunks remaining.
3. Taste. If it needs more sweetness, stir in a teaspoon of sugar and blend for another 10 seconds.
4. Pour into four cups and serve immediately. Slush separates within a few minutes, so hand them out and drink them fast.
6. Lemon shake-up
At most pool stands, lemon shake-up and fresh lemonade were the same drink with different names depending on the county you grew up in: half a lemon pressed into a wax cup, a scoop of sugar, cold water from the tap, and a snap-on lid that the kid behind the counter flipped on before shaking everything together over the counter. Nobody ever finished one clean. The cup always came back to the blanket with an inch of warm, thin lemon water at the bottom, the ice long gone, a spent lemon wedge still floating in it. That last inch got drunk anyway, because the walk back from the concession stand was long and hot and the cup was still in your hand. The ‘shake-up’ name is most closely tied to Midwestern county and state fairs, especially in Illinois and Indiana, where lemon shake-up stands are still a fixture of the midway.
Ingredients (Serves 4)
-
1/2 to 3/4 cup granulated sugar (2 to 3 tablespoons per cup)
Instructions
1. Roll each lemon hard on the counter under your palm for about 10 seconds to loosen the juice. Halve each lemon, then cut each half into 4 wedges.
2. For each serving, drop the wedges from half a lemon into a 16-ounce cup that has a tight lid, or into a cocktail shaker.
3. Add 2 to 3 tablespoons of sugar to the cup, then fill it with about 1 cup of ice and about 1 cup of cold water, leaving some room at the top.
4. Cap the cup and shake hard for about 20 seconds, until the sugar dissolves and the lemon wedges have given up their juice.
5. Repeat with the remaining lemon halves for 4 servings, and serve with the wedges still in the cup.
7. Homemade tater tots
The concession stand tot came in a small paper tray, maybe a dozen of them, and you ate while still dripping on the hot concrete. Real crunch on the outside, soft and steamy through the middle, salted just enough. No dipping sauce at the pool. Nobody offered it, and nobody missed it.
Getting them right comes down to three things: a starchy potato, a short parboil, and a dry shred. Russets are the correct variety because their high starch content is what gets a tot to hold its shape and go crisp. Boiling the whole peeled potatoes for 8 minutes before grating partly cooks the starch, so the shreds stick together in the hand and the centers finish cooking in the oil instead of staying raw. A box grater on its large holes does the shredding; the food processor is faster but cuts the strands too short and the finished tot comes out dense rather than light. Once grated, the potato goes into a clean kitchen towel and gets wrung hard over the sink. A single large russet releases a startling amount of water, and wet potato steams in hot oil instead of frying. Two tablespoons of flour in the seasoned mixture handles the binding.
Seasoning the potato before forming, rather than after frying, lets the salt work its way through instead of riding only on the crust, and grating onto a sheet pan instead of into a bowl keeps the shreds loose while the rest of the potatoes get done. Forming them is the slow part of the job, which means rolling about a tablespoon of the mixture between your palms and pressing firmly until you have a compact cylinder. They hold together better than you’d expect, as long as the potato was dry enough going in.
Ingredients (Makes about 50 tots, serves 4 to 6)
-
2 pounds russet potatoes (about 3 large), peeled
-
1 teaspoon salt, plus more for finishing
-
1/2 teaspoon garlic powder
-
1/4 teaspoon onion powder
-
1/4 teaspoon black pepper
-
2 tablespoons all-purpose flour
-
2 cups vegetable oil, for frying
Instructions
1. Put the whole peeled potatoes in a pot, cover with cold salted water, and bring to a boil. Boil 8 minutes, until a knife meets firm resistance at the center; they should not be cooked through. Drain and refrigerate until fully cool, at least 30 minutes.
2. Grate the cooled potatoes on the large holes of a box grater onto a sheet pan.
3. Transfer the shredded potato to a clean kitchen towel, gather the corners, and wring it hard over the sink to squeeze out as much liquid as possible. Open the towel, fluff the potato slightly, then wring it again. The shreds should feel nearly dry to the touch.
4. Transfer the squeezed potato to a large bowl. Add 1 teaspoon salt, the garlic powder, onion powder, black pepper, and flour. Toss with your hands until the seasoning and flour are evenly distributed.
5. Scoop about 1 tablespoon of the mixture at a time and roll it between your palms, pressing firmly to form a compact cylinder about 1 inch long and 3/4 inch wide. Set each one on a sheet pan as you go. You should end up with about 50 tots.
6. Pour the vegetable oil into a heavy 10-inch skillet to a depth of about 1/2 inch and heat over medium-high until the oil reaches 350°F on an instant-read thermometer.
7. Fry the tots in batches of 8 to 10, without crowding, for 3 to 4 minutes on the first side until deep golden brown. Turn each tot and cook another 3 minutes on the second side. Adjust the heat as needed to keep the oil around 350°F.
8. Transfer to a paper-towel-lined plate. Season with a pinch of additional salt while still hot and serve immediately.
Most of these recipes hit the same notes as the originals on the first try, any month of the year, because the originals were never complicated to begin with. Pool food was built for people who had better things to do than stand over a stove.