
The phone call came in the afternoon, or a telegram came to the door. Either way, she had a few days’ notice and she used every hour of it. In the 1950s and early 1960s, a son’s leave from the Army, the Marines, or the Navy might be the only time in months she’d have him at the table, and she cooked accordingly.
The menu was never random. She knew what he ate before he left and she meant to put every bit of it in front of him before he shipped back out. Some dishes were practical, ones she could start the day before, timed to come out of the oven right when he walked through the door. Others cost more than an ordinary Tuesday warranted and were held back for occasions worth it. All seven of the dishes here fall into one of those two camps.
1. Standing rib roast with pan drippings gravy
A standing rib roast was not a Tuesday night decision. It was the roast a mother called the butcher about, sometimes a week out, to make sure he held a good one. Three ribs, bone-in, roughly seven pounds. She had been planning the meal since the telegram or the phone call came, and this was the centerpiece, the piece of meat that made the table look like she had pulled out everything she had.
The pan drippings gravy is the reason you roast it bone-in. Those bones and the browned bits on the pan bottom give you more flavor than you can get from a boneless roll. Let the roast sit out for a full hour before it goes into the oven, get the exterior browned at high heat first, then drop the temperature and roast to 145°F by thermometer. The gravy comes together in the roasting pan while the meat rests, so it is ready by the time the roast is carved.
A three-rib roast was genuine money. A rib roast cost more per pound than everyday cuts, and a six-to-seven-pound one was a real expense at a time when the federal minimum wage sat between one dollar and a dollar and a quarter an hour.
Ingredients (Serves 6 to 8)
-
1 standing rib roast, 3 ribs (about 6 to 7 pounds bone-in)
-
1 teaspoon black pepper, freshly ground
-
1/2 teaspoon garlic powder
-
3 tablespoons all-purpose flour
Instructions
1. Remove the roast from the refrigerator 1 to 1 1/2 hours before cooking. Pat the surface completely dry with paper towels. Rub the salt, pepper, and garlic powder all over the exterior.
2. Preheat the oven to 450°F. Set the roast bone-side down in a heavy roasting pan; the bones act as a natural rack.
3. Roast at 450°F for 20 minutes to brown the exterior and develop a crust. Do not open the oven during this time.
4. Reduce the oven to 325°F. Continue roasting until a meat thermometer inserted in the thickest part, away from any bone, reads 145°F. The USDA minimum for whole muscle beef cuts is 145°F with a 3-minute rest, and that is the target for this recipe. Budget roughly 15 minutes per pound from the time you lower the heat, but go by the thermometer, not the clock.
5. Transfer the roast to a cutting board, tent it loosely with foil, and let it rest at least 20 minutes before carving.
6. Pour off all but 3 tablespoons of drippings from the roasting pan. Place the pan over medium heat on the stovetop. Whisk in the flour and cook for about 1 minute, stirring, until the mixture smells faintly nutty. Pour in the beef broth in a slow stream, whisking constantly and scraping up any brown bits from the pan bottom. Simmer until the gravy has body and coats a spoon, 4 to 5 minutes. Taste and adjust the salt and pepper.
7. Carve the roast by running a knife along the bones to free the meat in one piece, then slice across the grain to the thickness you want.
2. Deviled chicken
Deviled chicken was a name that covered a lot of ground in American kitchens. The general idea: chicken pieces coated in a paste of mustard, butter, and something hot, pressed into breadcrumbs, and roasted until the outside went hard and spiced. The word “deviled” had long been used for food seasoned hard with mustard or pepper, and by the 1950s versions of this chicken turned up in newspaper food pages and the recipe boxes they were clipped into. For a mother who’d been planning a homecoming meal since the telegram arrived, it was the kind of dish that felt like a real production without demanding much beyond a hot oven and some patience.
What comes off the pan is all contrast. The breadcrumb shell goes fully dry and crackly, and it catches on your teeth before giving way. Under it, the skin has rendered and gone soft and fatty. The meat itself pulls from the bone without any resistance if the thighs had enough time in the heat. Salt hits first, sharp from the mustard and layered in by the Worcestershire sauce, and then a low burn spreads back across the tongue from the cayenne. The chicken is hottest right out of the oven, almost too hot to handle, and the steam that rises when you pull a piece apart carries all of it at once.
Coating the pieces the night before and leaving them uncovered on a rack in the refrigerator lets the surface dry out, and dry breadcrumbs brown instead of going to paste. Bone-in, skin-on thighs and drumsticks hold up better than breasts here, because the fat keeps the meat tender under the direct heat. Keeping the mustard at about twice the butter, as this recipe does, leaves the coating with some bite after it bakes.
Ingredients (Serves 4 to 6)
-
3 pounds bone-in, skin-on chicken thighs and drumsticks (about 6 to 8 pieces)
-
3 tablespoons Dijon mustard
-
1 tablespoon dry mustard powder
-
1 1/2 tablespoons unsalted butter, melted
-
1 tablespoon Worcestershire sauce
-
1/2 teaspoon cayenne pepper
-
1/2 teaspoon freshly ground black pepper
-
1 1/2 cups fine dry breadcrumbs
-
1 tablespoon vegetable oil
Instructions
1. Pat the chicken pieces dry with paper towels and set them on a wire rack placed over a rimmed baking sheet.
2. In a small bowl, stir together the Dijon mustard, dry mustard powder, melted butter, Worcestershire sauce, cayenne, kosher salt, and black pepper until smooth.
3. Brush the mustard paste evenly over all sides of each piece.
4. Pour the breadcrumbs into a shallow dish. Press each coated piece firmly into the crumbs on all sides until completely covered, then return it to the rack.
5. Refrigerate uncovered for at least 1 hour, or overnight.
6. When ready to cook, heat the oven to 400°F. Drizzle the vegetable oil onto a large rimmed baking sheet and tilt to coat the surface.
7. Arrange the chicken pieces skin-side up on the oiled pan, leaving space between them.
8. Bake for 40 to 45 minutes, until the crumb coating is deep amber and an instant-read thermometer inserted into the thickest part of a thigh reads 165°F.
9. Let rest 5 minutes before serving.
3. Harvard beets
Harvard beets showed up partway through the visit, not the first evening when the standing rib roast had the whole table’s attention. A mother planning a son’s leave thought in whole weeks. She knew which nights called for the good plates and which ones just needed a solid supper from the pantry. Canned sliced beets were the thing, and the sweet-sour glaze that turns them into Harvard beets takes one pot and about ten minutes.
The name gets explained a dozen ways, most of them pointing to the beets’ deep crimson, which runs close to Harvard’s color. Whatever the origin, the dish held steady in Midwestern and Northeastern home kitchens through the mid-century, a reliable side for ham or pork chops, anything that needed a bright, tart note alongside it. Butter goes in at the end, off the heat, to round out the vinegar.
Ingredients (Serves 4 to 6)
-
2 cans (15 ounces each) sliced beets, drained, 1/3 cup of the canning liquid reserved
-
2 tablespoons unsalted butter
Instructions
1. Drain the beets into a bowl, measure out 1/3 cup of the canning liquid, and set both aside.
2. Whisk together the sugar, cornstarch, and salt in a medium saucepan. Pour in the reserved beet liquid and the cider vinegar, whisking until the cornstarch is fully dissolved and no lumps remain.
3. Set the saucepan over medium heat and cook, stirring constantly, until the mixture thickens and turns glossy, about 3 to 4 minutes.
4. Add the drained beets to the pan and stir to coat. Cook for 2 to 3 minutes more, stirring occasionally, until the beets are heated through.
5. Remove the pan from the heat and stir in the butter until it melts. Taste and add more salt if needed. Serve warm.
4. Overnight icebox rolls
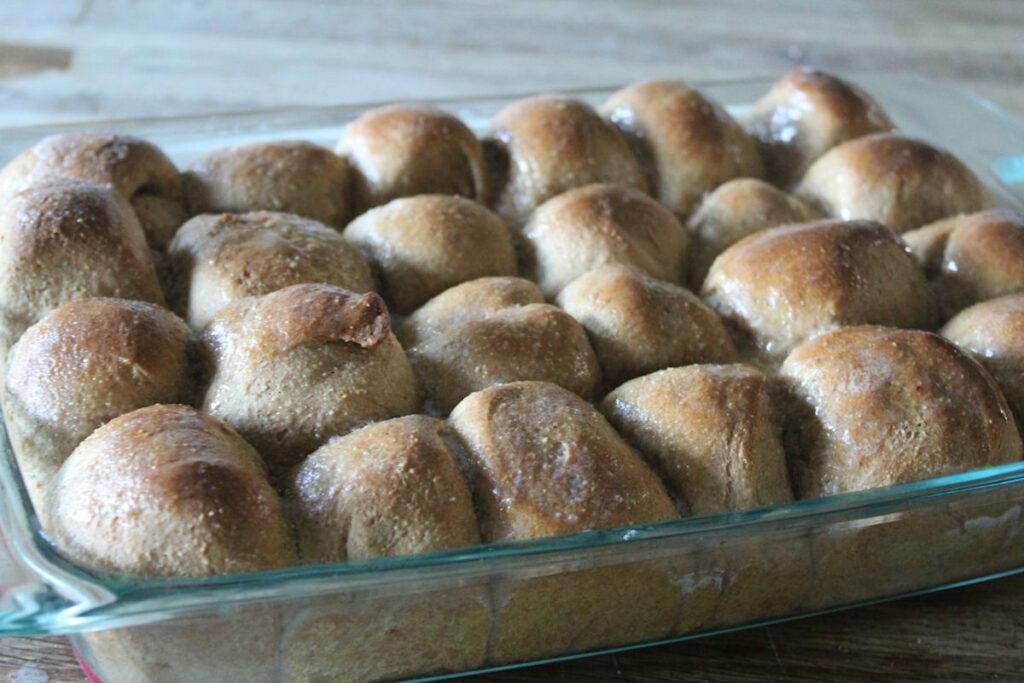
The rolls that came out of the oven for that first dinner weren’t the same rolls that showed up at breakfast the next morning, but they were close. Split and laid cut-side down in a dry cast-iron pan until the crumb went golden, then brought to the table with butter and whatever jam was open. The dough keeps in the refrigerator for up to two days, so a mother could mix it before he arrived and bake a pan whenever the house filled up again. The name ‘icebox rolls’ hung on for years after electric refrigerators replaced real iceboxes, and plenty of cookbooks of the period printed the same dough as ‘refrigerator rolls.’
Ingredients (Makes 24 rolls)
-
2¼ teaspoons active dry yeast
-
¼ cup warm water (105 to 115°F)
-
1 cup whole milk, warmed to about 110°F
-
4 tablespoons unsalted butter, softened, plus more for the pan and for brushing
-
3½ cups all-purpose flour, plus up to ½ cup more if the dough is very sticky
Instructions
1. Stir the yeast into the warm water with a pinch of the measured sugar. Let it sit for 5 to 10 minutes until foamy.
2. Combine the warm milk, remaining sugar, salt, and softened butter in a large bowl. Stir until the butter partially melts and the sugar dissolves.
3. Add the foamy yeast mixture and the beaten egg to the milk mixture and stir to combine.
4. Add 3½ cups of flour one cup at a time, stirring after each addition, until a shaggy dough forms. Turn it out onto a floured surface and knead for 8 minutes, adding flour a tablespoon at a time only if the dough is sticking badly to your hands, until it is smooth and slightly tacky.
5. Place the dough in a lightly buttered bowl, turn it once to coat, and cover the bowl tightly with plastic wrap or a lid. Refrigerate for at least 8 hours and up to 48 hours; the dough will rise slowly in the cold.
6. Remove the dough from the refrigerator and let it rest at room temperature for 20 minutes. Butter a 9-by-13-inch baking pan.
7. Divide the dough into 24 equal pieces. Roll each piece into a smooth ball and arrange them in the buttered pan in four rows of six.
8. Cover the pan loosely with a clean kitchen towel and let the rolls rise at room temperature for 1½ to 2 hours, until they are puffed and pressing against each other.
9. Preheat the oven to 400°F during the last 20 minutes of the rise.
10. Bake for 14 to 16 minutes, until the tops are deep golden brown. Brush with softened butter while still hot.
5. Apple crisp with oat topping
Apple crisp leans on one pantry staple that every household kept for breakfast: old-fashioned rolled oats. Oats hold their texture through baking in a way that flour alone won’t, which is what gives the topping its crunch. No pie crust to roll out, no chilled lard to cut in. A mother with a day’s notice could put this together in fifteen minutes flat, with apples from the cellar or the fruit bowl and oats from the canister above the stove. Cold butter cut small is what keeps the clusters from melting flat before the topping sets, and tart apples give the brown sugar on top something to push against.
Ingredients (Serves 6 to 8)
-
3 pounds tart apples (about 6 medium), peeled, cored, and sliced 1/4 inch thick
-
2 tablespoons granulated sugar
-
1 tablespoon fresh lemon juice
-
1 1/2 teaspoons ground cinnamon, divided
-
1/4 teaspoon ground nutmeg
-
1 cup old-fashioned rolled oats
-
1/2 cup all-purpose flour
-
3/4 cup packed brown sugar
-
6 tablespoons cold unsalted butter, cut into small cubes
Instructions
1. Preheat the oven to 350°F. Lightly butter a 9×9-inch baking dish (an 8×8 will be very full).
2. Toss the apple slices with the granulated sugar, lemon juice, nutmeg, and 1 teaspoon of the cinnamon until evenly coated. Spread the apples in an even layer in the prepared dish.
3. In a medium bowl, stir together the oats, flour, brown sugar, remaining 1/2 teaspoon cinnamon, and salt. Add the cold butter cubes and work them in with your fingertips, pressing and rubbing until the mixture forms rough, sandy clusters with no dry patches of flour remaining.
4. Scatter the topping evenly over the apples. Keep it loose and do not press it down.
5. Bake 45 to 50 minutes, until the topping is deep golden brown and the apple juices are bubbling at the edges of the dish.
6. Let the crisp rest at least 10 minutes before serving so the juices thicken slightly.
6. Chess pie
Chess pie is essentially a pantry custard baked in a shell: eggs, butter, sugar, a spoonful of yellow cornmeal, and very little else. The filling sets to a papery, crinkled top over a dense, sweet interior closer to a set custard than anything you would call fluffy. Its ancestry is usually traced to English curd and cheese tarts brought over by British settlers, and by the time it settled into Southern kitchens as a recognizable thing, it was deliberately frugal; butter and eggs did all the work, no cream or pastry tricks required. That economy made it the pie a mother could pull together on short notice without a trip to the store.
Families who moved north for factory work during and after the war likely carried recipes like this one with them, and the pie shifted from kitchen to kitchen. Some cooks swapped the cornmeal for a spoonful of flour, and others added a splash of cider vinegar, which sets the filling a touch sharper and cuts the sweetness. The version here keeps both the cornmeal and the vinegar, the way many older recipes print it.
Ingredients (Serves 8)
-
1 unbaked 9-inch pie shell
-
1/2 cup (1 stick) unsalted butter, melted and slightly cooled
-
1 1/2 cups granulated sugar
-
1 tablespoon yellow cornmeal
-
1 tablespoon cider vinegar
-
1 teaspoon vanilla extract
Instructions
1. Preheat the oven to 325°F.
2. In a medium bowl, whisk together the melted butter and granulated sugar until smooth.
3. Add the eggs one at a time, whisking well after each addition.
4. Stir in the cornmeal, cider vinegar, vanilla extract, and salt until evenly combined.
5. Pour the filling into the unbaked pie shell.
6. Bake for 45 to 50 minutes, until the top is deep golden and the center is just barely set when you nudge the pan. The filling will puff during baking and settle as it cools.
7. Transfer to a wire rack and cool completely, at least 2 hours, before slicing. The filling firms up considerably as it cools and will not slice cleanly while still warm.
7. Strawberry shortcake with drop biscuits
Strawberry shortcake was the dessert a mother reached for when good berries could be had, and plenty of mothers made it on drop biscuits rather than sponge cake. The biscuits come out rough-edged and craggy, split by hand rather than sliced, and that ragged interior catches the berry juice in a way a smooth cake layer never does.
The berries need at least thirty minutes alone with the sugar before anything else happens. That resting time pulls out their juice, and that pooled, pink syrup is what the dessert is actually built around. Skip it and you’re left with sweetened fruit on a dry biscuit. For the biscuits, cold butter is not optional. It goes in straight from the refrigerator, cut into small cubes and handled quickly, because butter that softens before the pan goes in the oven turns a light biscuit into a flat one.
Ingredients (Makes 8 shortcakes, serves 8)
-
2 pounds fresh strawberries, hulled and sliced
-
1/3 cup granulated sugar, for the berries
-
1 tablespoon baking powder
-
2 tablespoons granulated sugar, for the biscuits
-
6 tablespoons cold unsalted butter, cut into small cubes
-
1 cup heavy whipping cream
-
2 tablespoons powdered sugar
-
1/2 teaspoon pure vanilla extract
Instructions
1. Combine the sliced strawberries and the 1/3 cup granulated sugar in a large bowl. Stir to coat every piece, then set aside at room temperature for at least 30 minutes, until the berries have released a pooling pink syrup.
2. Preheat the oven to 425°F. Line a baking sheet with parchment paper.
3. Whisk together the flour, baking powder, 2 tablespoons granulated sugar, and salt in a large bowl until evenly combined.
4. Add the cold butter cubes to the flour mixture. Work them in with your fingertips or a pastry cutter until the mixture looks like coarse crumbs with some pea-sized pieces of butter still visible. Work quickly so the butter stays cold.
5. Pour in the cold milk and stir with a fork just until the dough comes together into a rough, shaggy mass. Stop as soon as there are no dry streaks of flour. Do not overmix.
6. Drop the dough by large spoonfuls, about 1/3 cup each, onto the prepared baking sheet, leaving 2 inches between them. You should get 8 biscuits.
7. Bake for 13 to 15 minutes, until the tops are golden and the edges are set and no longer look doughy.
8. While the biscuits bake, beat the heavy cream, powdered sugar, and vanilla in a chilled bowl until soft peaks form.
9. To serve, split each biscuit by hand, spoon a generous portion of strawberries and their syrup over the bottom half, add a spoonful of whipped cream, and set the top half in place.
The phone call told her when he was coming. The food told him that someone had been counting down the days.